Close the cash register at 1s. Processing Closing a cash register shift
Processing “Closing a cash register shift” is intended for the automatic generation of a summary document “Report on Retail Sales” at the end of a cash register shift.
If the cash register operates in FR or Online mode, then at the end of the cash register shift, by processing “Closing the cash register shift”, all “Receipt” documents of this cash register shift are posted and deleted, and instead of them, a summary document of the cash register shift “Retail Sales Report” is automatically generated and posted. , which sums up the work of the cash register for the shift.
If the cash register operates in Offline mode, then issuing checks is not expected. When you select such a cash register for processing, the “Retail Sales Report” document is immediately generated.
If the system has an acquiring system connected that supports the operation of reconciling card totals, then a flag becomes available that allows you to specify whether to reconcile totals when closing a cash register shift. If the system has more than one acquiring system connected that supports reconciliation of card totals, and the “Reconciliation of card totals” flag is set, then before reconciling the totals you will be asked to select the acquiring systems for which you will need to reconcile the totals.
Published 08/18/2017 15:25 Views: 8440In the last article, we examined documents that can be used to print checks in the program “1C: Public Institution Accounting 8, edition 2.0” (). After you have selected a document for printing receipts, you need to understand the algorithm of the cash register shift as a whole.
It includes several points:
1. To start working, you need to make sure that the cash register is turned on. This is a simple and logical procedure, but it is not always followed. In order for the cash register shift and receipt printing to be carried out without problems and hesitations, make sure that the cash register is turned on and there is an Internet source.
2. Open a cash register shift. You can do this as follows:
A processing form opens, which allows you to manage cash register shifts:

In this form, you need to select the cash register whose shift you plan to open, and use the “Open cash register shift” button:

When opening a shift, a “Cash Shift” document is generated with the status “Open”.
3. Generate the necessary documents for printing checks and print checks at the cash register during the cash day.
4. After the cash register day is over, you need to close the shift. This is also done using the “Fiscal device management” processing:

If checks were printed from the “KKM Receipt” document, after the cash register shift is closed by the cashier, the accountant needs to reflect the received funds in accounting. To do this, a report on cash register shifts is generated, you can find it:

We indicate the necessary data and, using the special button, fill out the document:


Based on the report, we create the document “Cash receipt order”, which will generate the necessary transactions:

In general, the algorithm for working with an online cash register is simple; it is important not to forget to open cash register shifts at the beginning of the day and close them after the end. I would like to draw your attention to the importance of opening/closing cash register shifts. Firstly, if the cash register shift is not open, then printing checks is basically impossible (1C will give an error when trying to print a check). This is a mandatory regulatory procedure. It should also be remembered that cash discipline rules require closing the cash register shift at the end of each day. Unfortunately, you can open a cash register shift in the morning, even if you forgot to close the shift yesterday. But still, it is methodically correct to open and close shifts within one cash day.
I would also like to mention what type of checks should be issued to the buyer. In accordance with the law, the buyer has the right to receive an electronic check, which will be equivalent to a paper one. But it is possible for the buyer to receive both types of checks at his request. If the buyer requests to receive both checks, the seller must provide both.
There is also another important point that needs to be reported. Among the requirements for the check is the indication on it of the position, surname, first name, patronymic and INN (when creating a cash correction check - among the additional requirements is the cashier's INN). Therefore, in the user manual:


Let's find a user who will print checks:

For this user, it is necessary to indicate in the “Individual” detail the employee who is responsible for the operation of the cash register:


It is also necessary to check that the selected individual has correctly and completely filled in the data: last name, first name, patronymic and TIN:

Also, for an individual, the “Employees” directory must reflect the corresponding element - an employee indicating the position.
Well, the last interesting nuance regarding online cash registers, which I would like to tell you about: this is the indication of the default buyer in the cash register settings. You can find a list of cash registers:

Each cash register on the second tab has the ability to specify the buyer and the agreement when printing a receipt from the document “KKM Receipt”:

It’s convenient because you can simplify your work and not have to fill in the corresponding field every time in the document. The program will substitute this data directly from the details specified in the cash register settings.
In this article, we figured out how the online cash register works and what interesting nuances exist when working with it in the 1C: Government Accounting program, edition 2.0. And if you missed the previous materials about working with online cash registers in 1C, they can be found at the following links:
Online cash registers (part 1) - general information and connection to 1C
Online cash registers (part 2) - printing receipts in 1C

Methods for closing a cash register shift
Step-by-step instructions on how to close a shift through the cashier's workplace (RMK)
Step 1. Go to the “Cashier Workplace” menu
To close a shift, you need to exit “Sales Registration” to the “Cashier Workplace” menu.
Step 2. Closing the shift
Click on the “Close shift” button. Then “Yes” to continue.
Rice. 2. Confirmation of shift closure
After confirmation, the program will check the unbroken checks in the database and provide information about them. Click on the “Close shift” button.

The program will close the shift.
Step 4. Print the receipt
A check with a Z-report and a report on the closure of the shift will be issued from the fiscal device. The program will display a notification about the successful closing of the cash register shift.
Rice. 4. Shift closed
Step-by-step instructions on how to close a cash register shift through the “Sales” menu
Step 1. Select “Sales”
In the main menu of the program, select “Sales”.

In the window that opens, in the “Service” section, find the item “Closing a cash register shift” and click on it.

Step 2. Select a cash register
In the “Closing cash register shift” window, select the desired cash register and click on the “Close shift” button.
Rice. 7. Closing a shift
Step 3. Checking blank checks
The program will check for unbroken checks in the database and provide information about them. Click on the “Close shift” button.
Rice. 8. Checking unpunched checks
The program will generate and display a notification on the screen.

Step-by-step instructions on how to close a cash register shift through fiscal device management
Step 1. Select “Finance”
In the main vertical menu, select “Finance”.

Find the "Service" section. Select “Fiscal device management” item.

"Fiscal device management"
Step 2. Fiscal device management
A separate window will open with commands for managing the cash register. Click on the “Close shift” button.

The program will prompt you to select from the list the shift that needs to be closed.
Rice. 13. Selecting a cash register shift
After the successful operation, the shift will be closed.

To connect a cash register with data transfer, you must perform preliminary steps - install the device driver and configure Internet access for the device. Internet access settings are made using the driver.
Connecting the device to the program is processed Connecting and setting up commercial equipment(interface Full, menu Service – Retail store equipment) on the tab CCP with data transmission.
The user needs to create a new directory item Retail store equipment, specifying service processing with equipment type CCP with data transmission and equipment model, and also fill in the field Name.
Then you need to press the button Options and make the necessary settings - port, model and other settings specific to this model. Click Device test.
After successfully connecting the device, the user can close the form using the button Save and close.
2.Opening and closing the cash register shift
When using online cash registers, at the beginning of a cash register shift, you must open the shift.
In cashier workplace mode (WWK), you can open a shift by command Open cash register shift from the menu Service. This command is only available when using online cash registers.
In manager mode, you can open a shift from the document list form Cashier shift(interface, menu Retail store equipment)
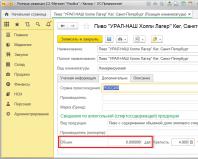
When opening a cash register shift, a document is created Cashier shift, in which the basic data of the current cash register shift is recorded: Organization, Cash register cash register to which the device is connected, Date and time of the start of the shift, status – Open.
Closing a shift can be done:
- in RMK mode on command Close cash register shift
- in manager mode by button Close shift document list forms Cashier shifts or by processing Closing a cash register shift(interface Retail Management, menu Retail store equipment)
When closing a shift, the shift completion time is filled in, the status changes to Closed, and the details of the Fiscal data page are filled in.
This message has no labels
 (1 ratings, on average: 5,00 out of 5)